October 4, 2022
Welcome to Adaptr! For the first time ever, you have direct access to stream popular music by your favorite artists for your customers– in a simple, legal, cost-friendly way.
Adaptr provides the following features to get your music streaming:
PLAYLIST MANAGEMENT
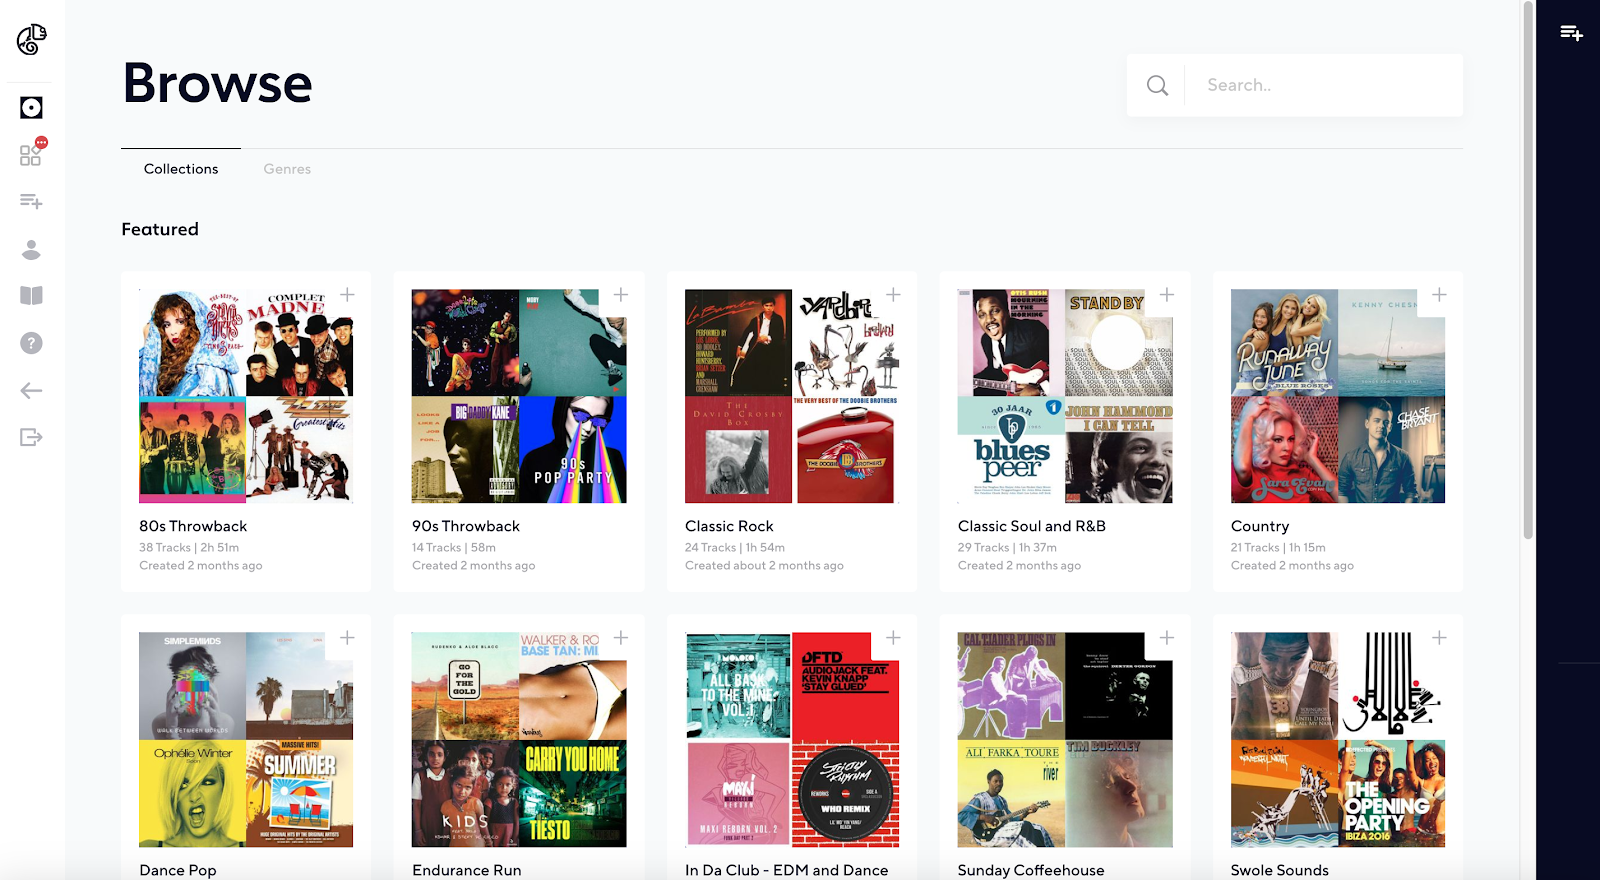
To create a playlist, you can add tracks from one of Adaptr’s pre-curated collections or from one of more than twenty genres, or you can search for and explore specific tracks.
Once you’ve created a playlist, you can later edit it, including the playlist name and its tracks.
To get started, choose from one of the pre-curated Collections or Genres:
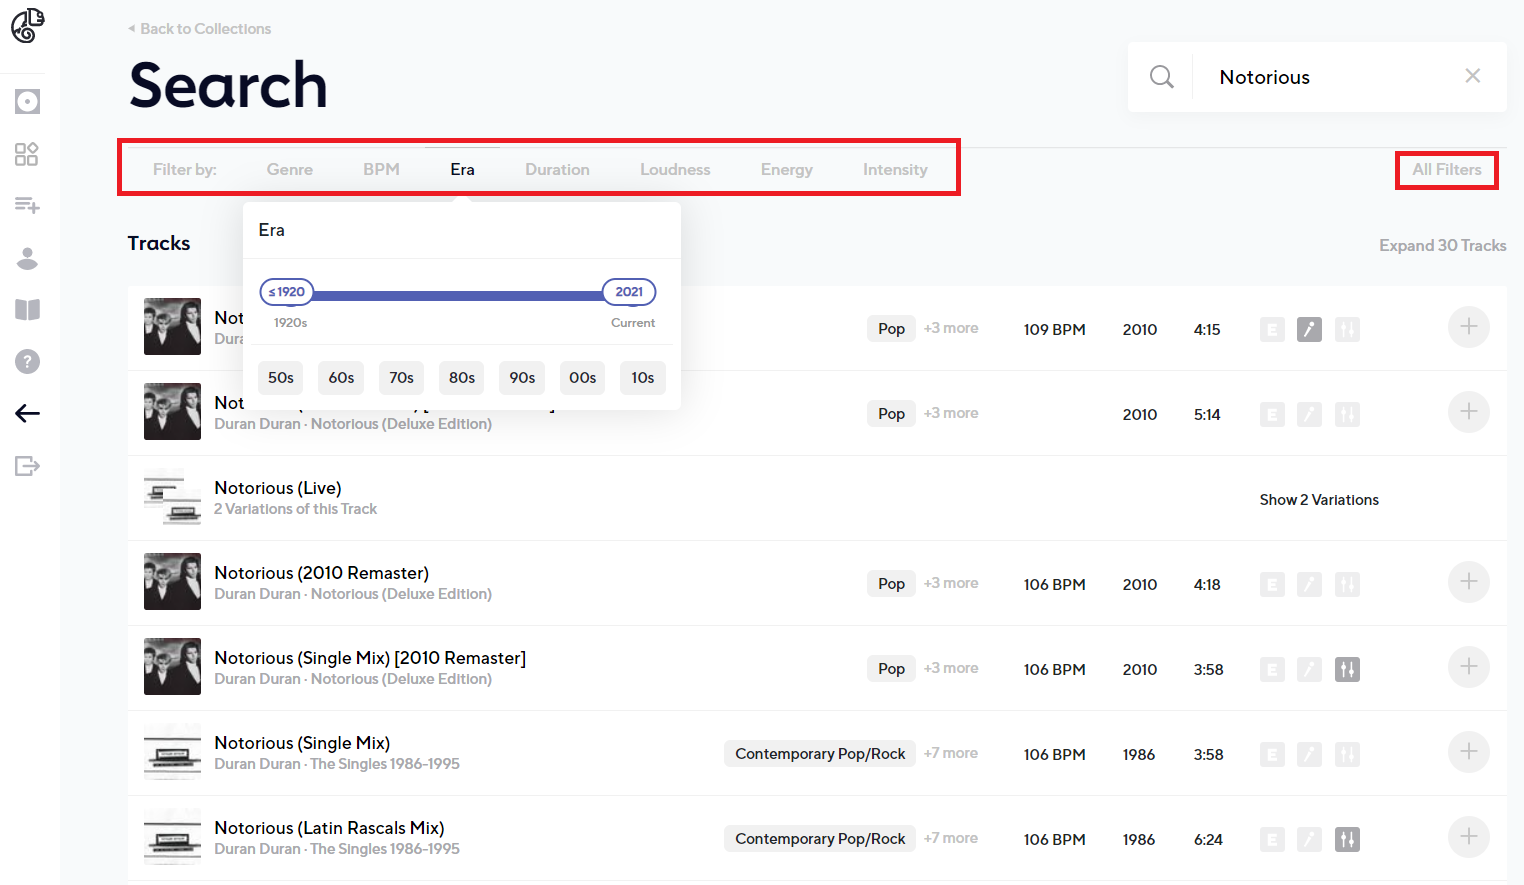
Or search for a track:

From here you can use filters to narrow your search:
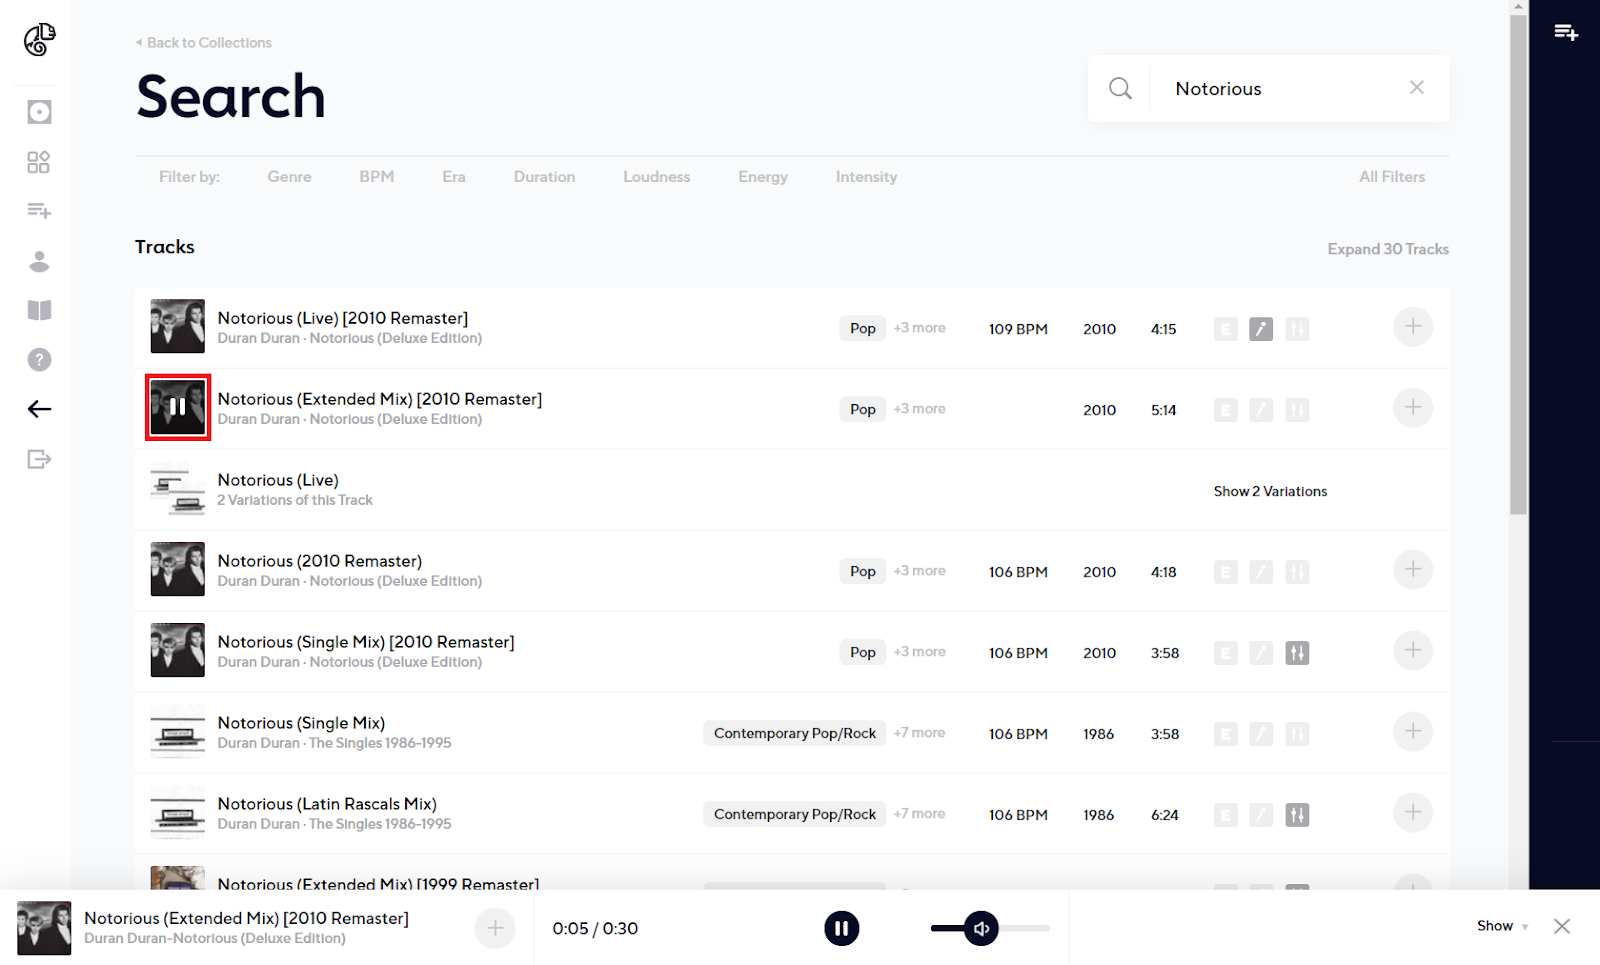
If you are not sure if you have the right track, or just want to jam, you can sample a song by clicking on the track’s album art:
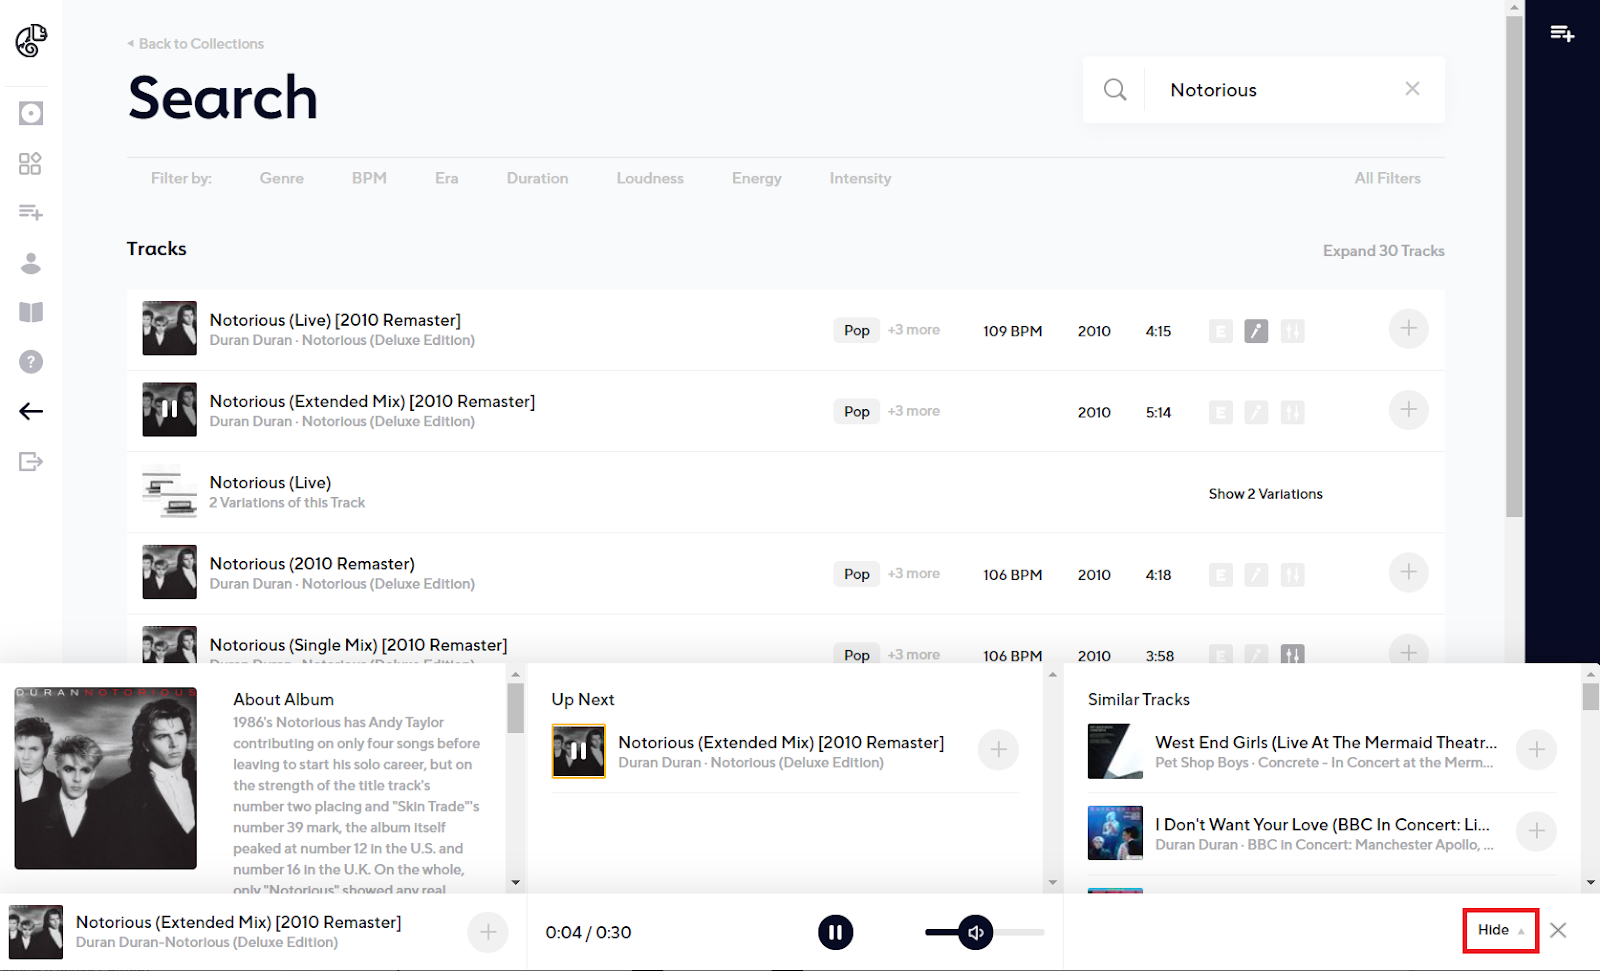
You can expand the Sample Player by clicking on the “Show” link to view more information about the track and see similar tracks. You can collapse the Sample Player by clicking the “Hide” link. You can close the Sample Player at any time by clicking on the “x”.
Once you have a track you like, add it to a playlist and give that playlist a name. Note - The playlist name is visible to end users.
Adaptr will provide you with recommended tracks based on the songs in your playlist bar. These are based on the content of your current playlist.

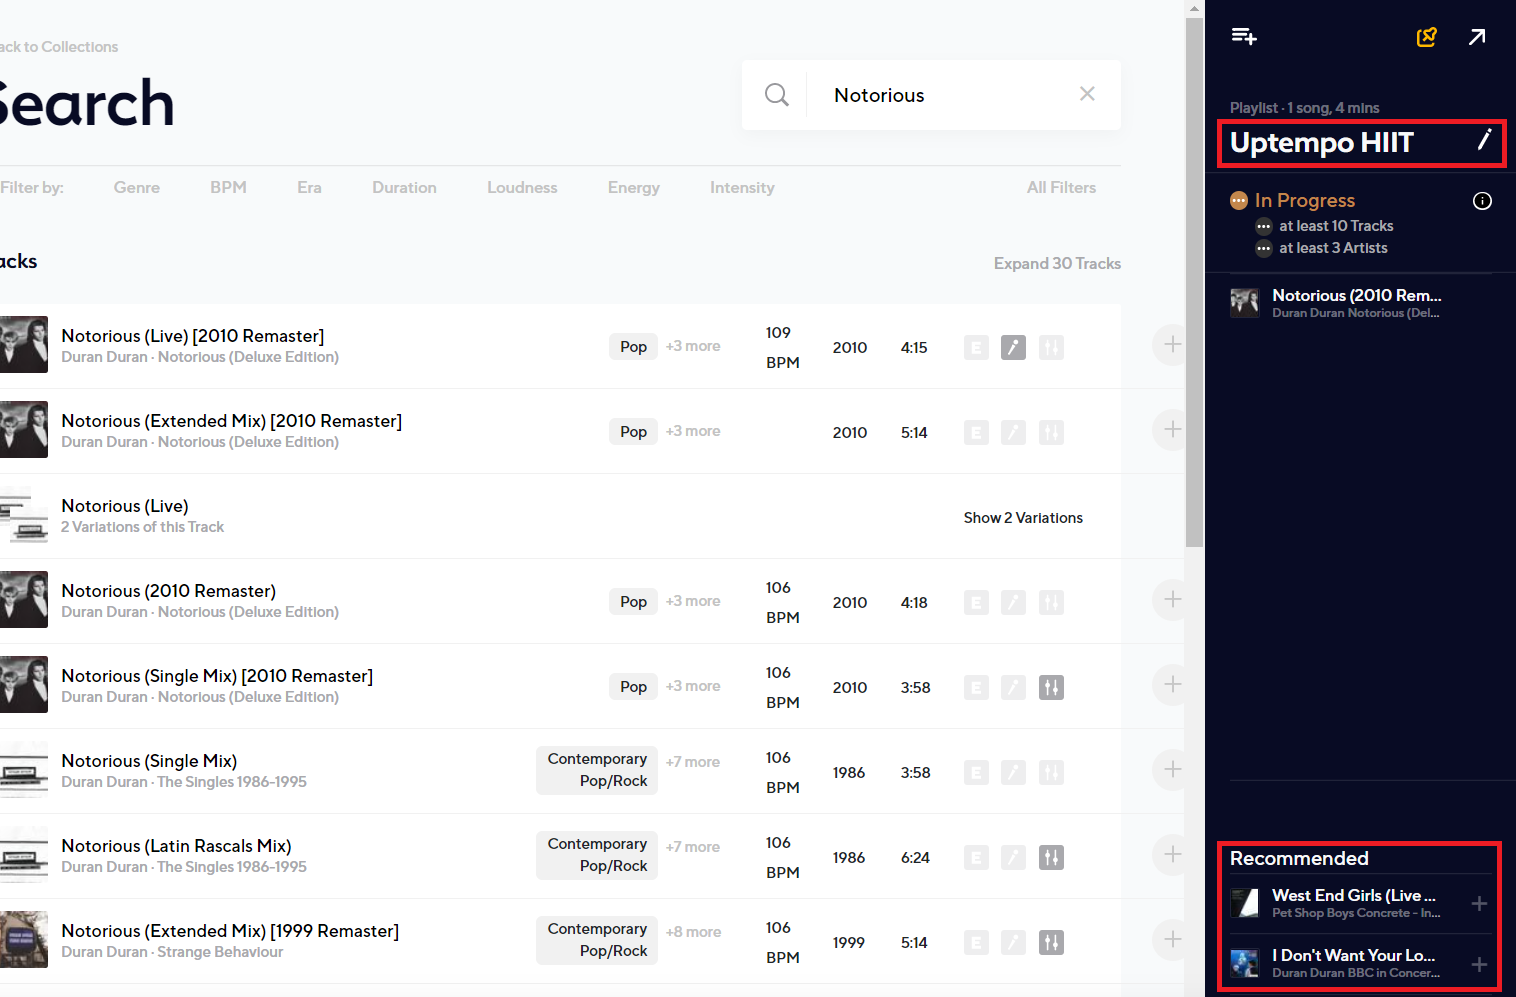
Adaptr automatically saves your playlist when you make changes. You will need at least ten songs from at least three different artists before a playlist can be published live.
CREATING AN APP
You need to connect the playlist you created on Adaptr to the application(s) your customers will interact with. This is done via an Adaptr App. Think of an App as a collection of playlists that can be tied to your application.
Creating and managing Apps is easy. Simply create an App by giving it a name. We suggest something that is familiar and easy to remember. For example, your company name or the name of your application as it might exist in an iTunes or Google Play app store. End users will not see this name.
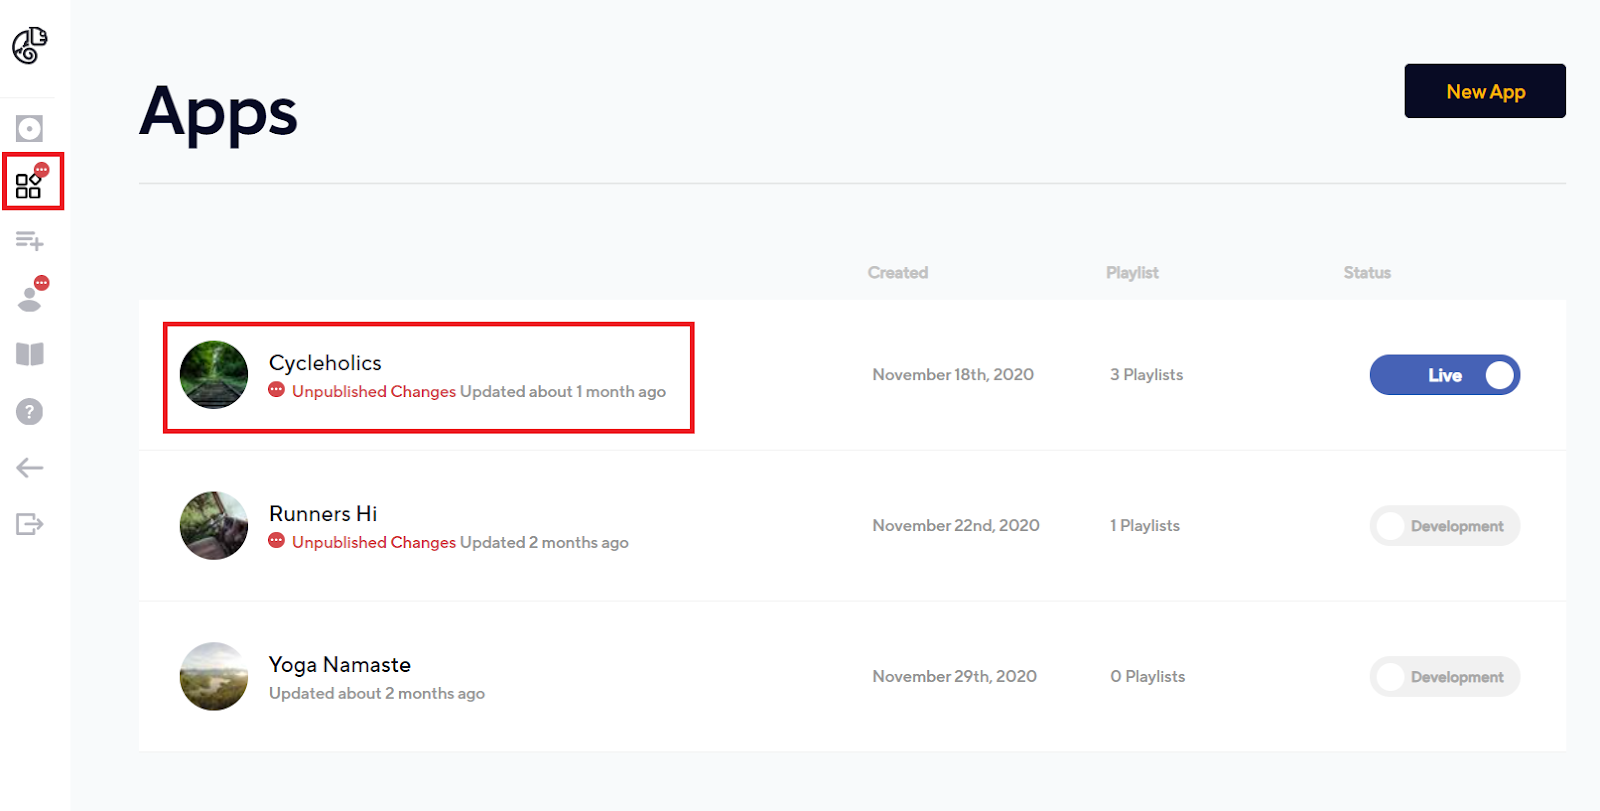
Navigate to the “Apps” screen from the main navigation to start the process and then select “New App”
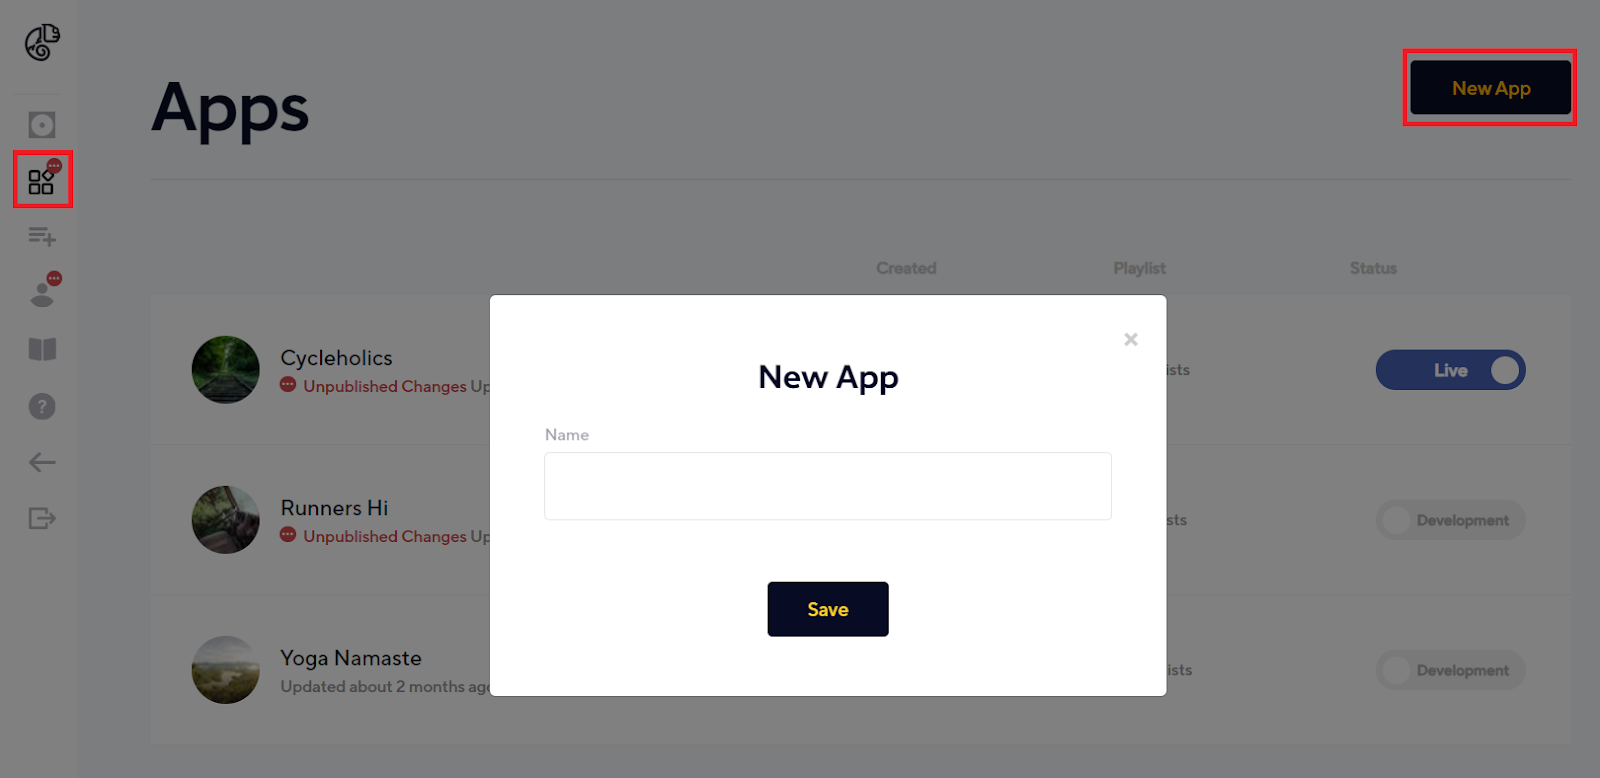
Apps are by default set to a “development” state. This means that you are testing the app in a sandbox environment.
To add a playlist to an App, from the App screen, select “New Playlist”. This will open a playlist bar on the right, and you can select which playlists you’d like to add by clicking on the playlist name.
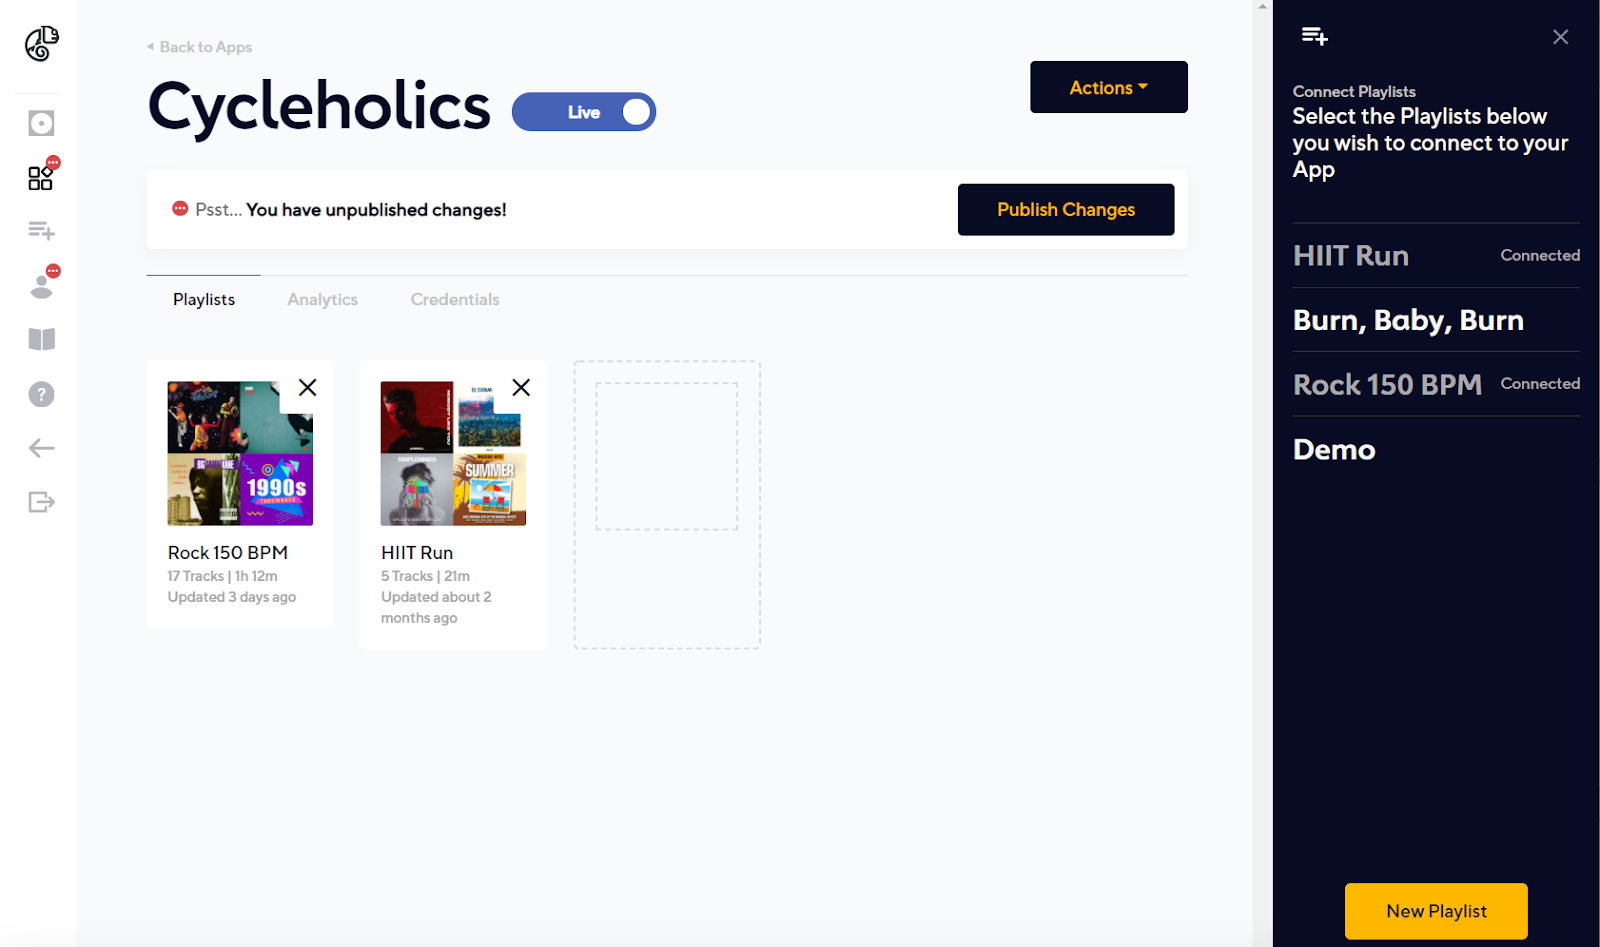
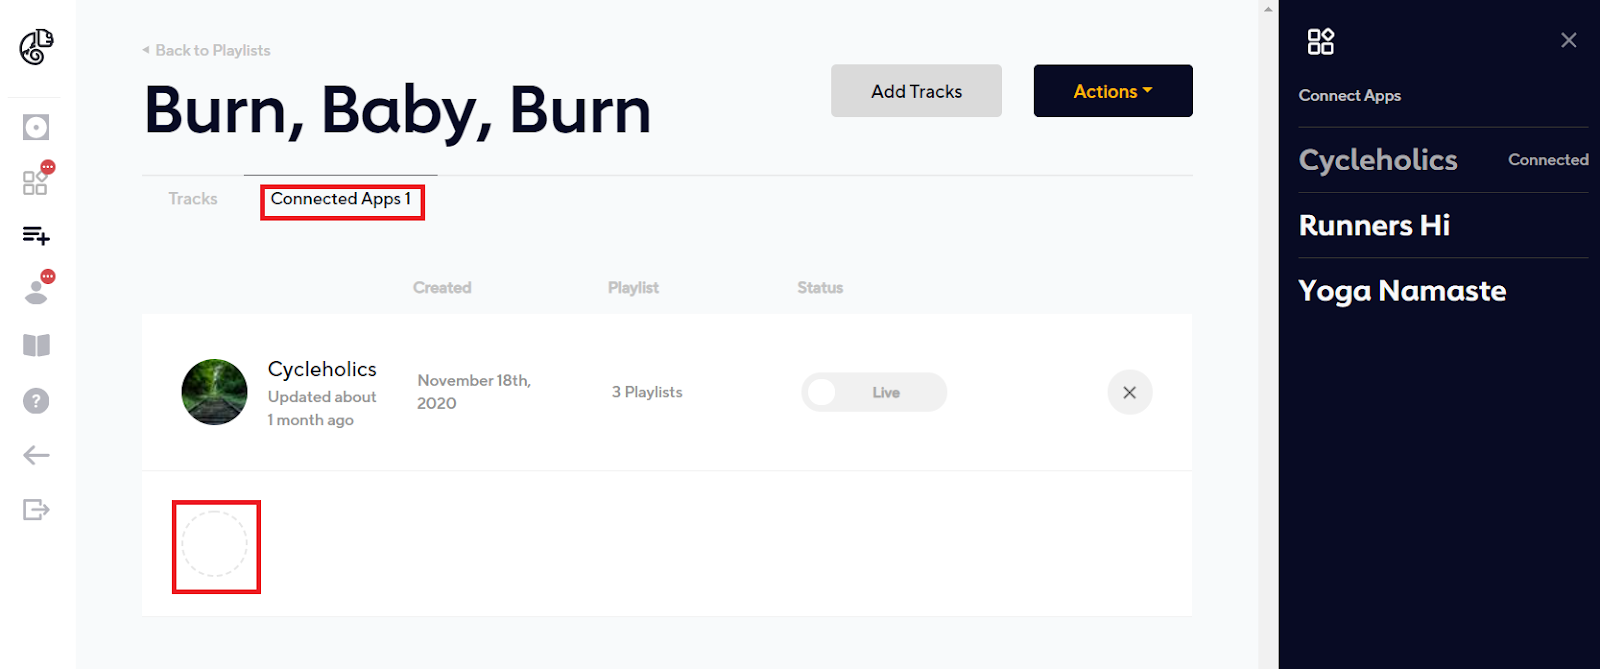
You can also add a playlist to an App from the playlist screen. To do so, select the playlist you want, and then click on the “Connected Apps” label at the top of the playlist. Then select “Connect Application”. This will open an app bar on the right. Simply click on the App you want to tie the playlist to.
You’ll need to publish at least one playlist to an application in order for your customers to listen to it. Only published playlists can be heard by your customers. You can edit a playlist later if you like. Just be sure to publish that playlist when you’re ready for the edits to be available for streaming.
To publish a playlist from the Apps screen, select the App you want, then click “Publish” and select a playlist.
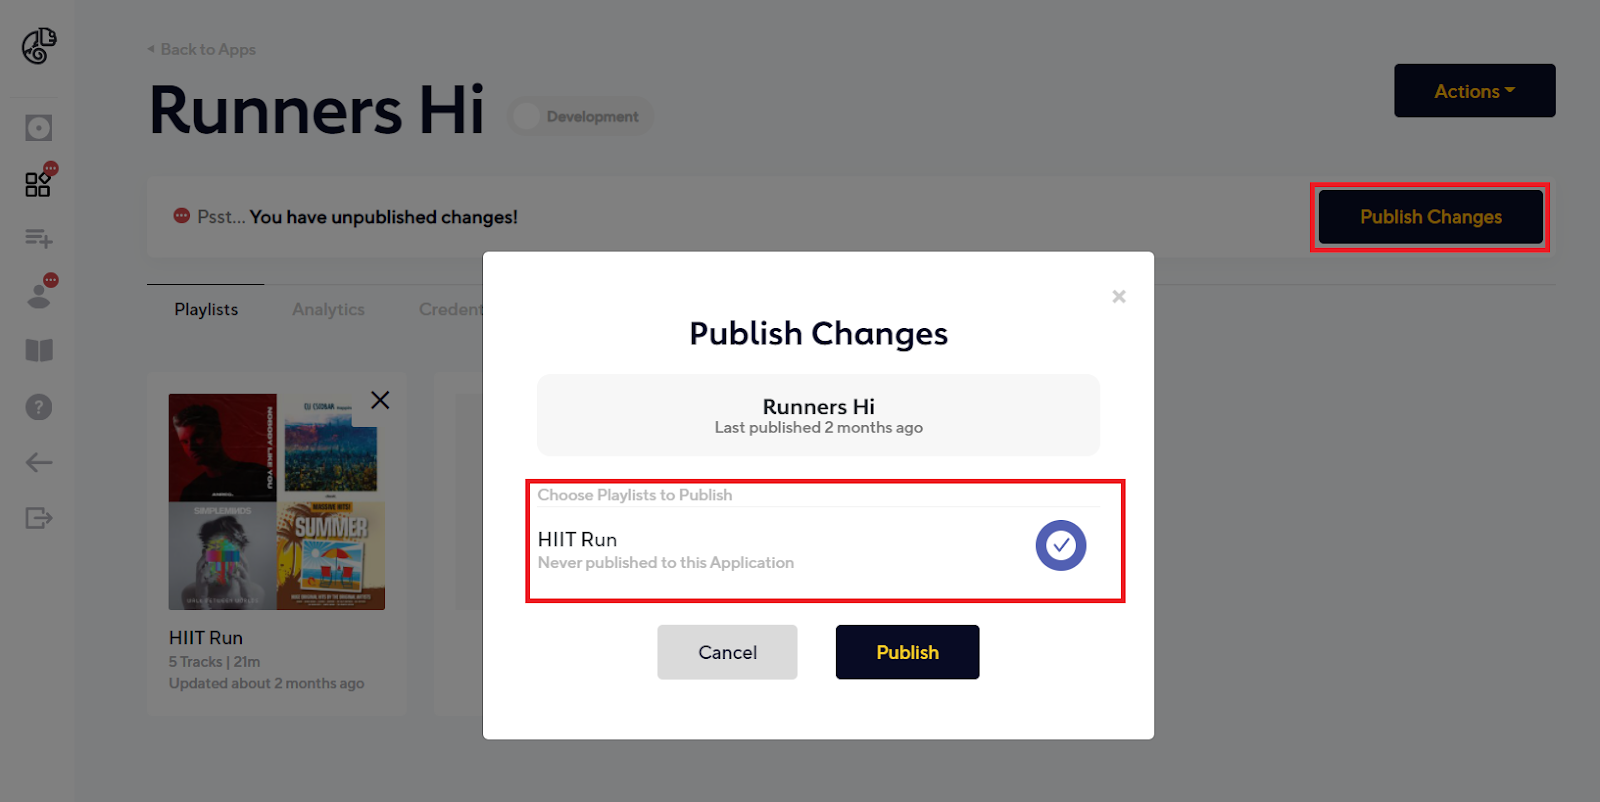
When a playlist is updated, it needs to be republished to any Apps where it is currently live if you want the edits to be streamed. This allows Content Managers to edit playlists as much as they’d like without having their changes go live until they’re ready. Adaptr provides prompts to let you know that you have made edits that are yet to be published. There is one in the Apps menu bar and one on the Apps page
When you’re ready to go live, simply launch the App to a “Live” state.
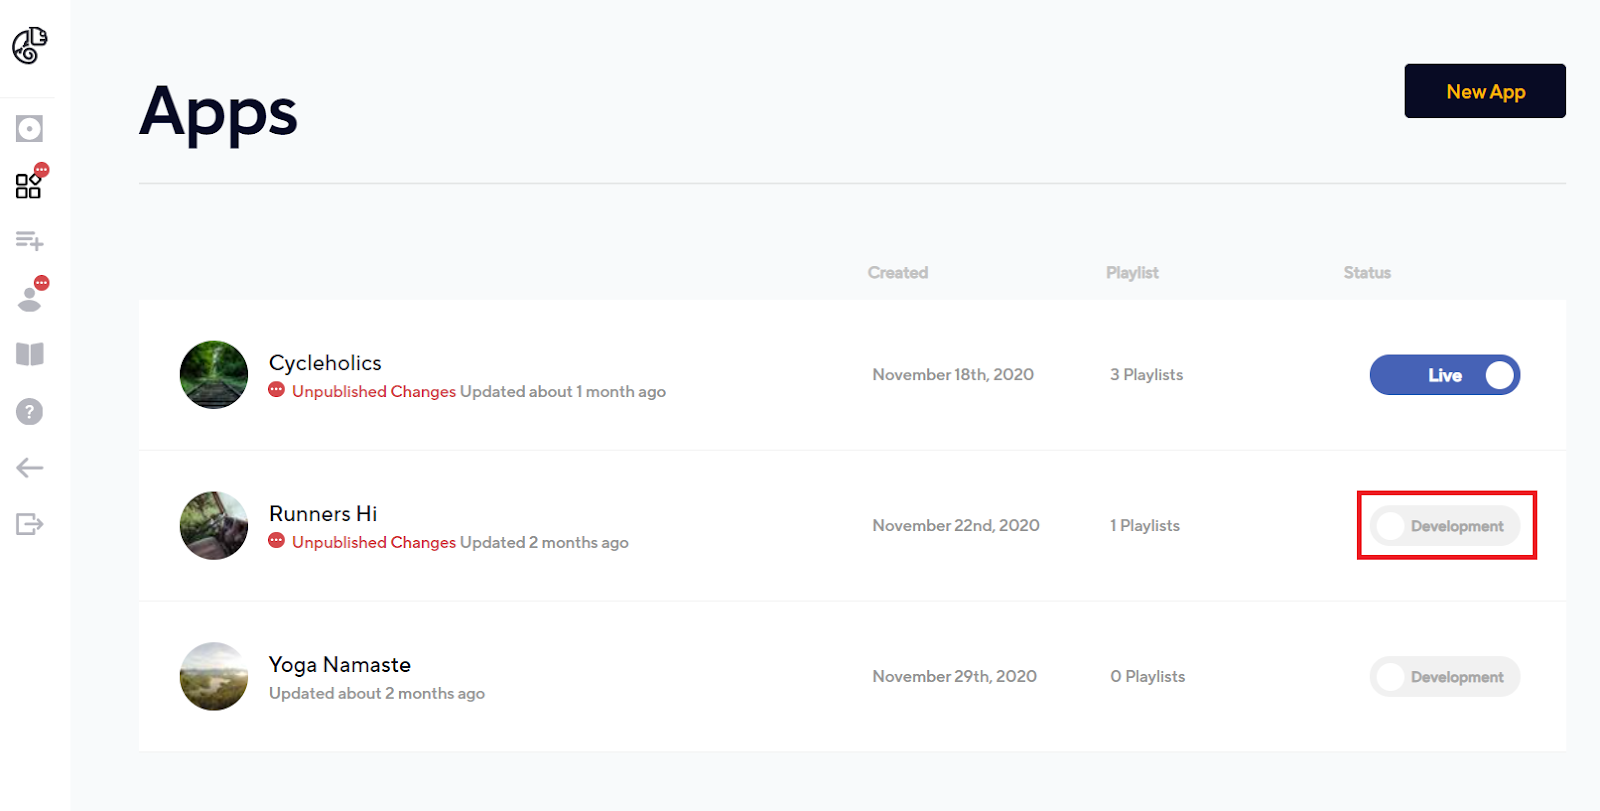
You can set the App back to a Development state at a later time if you’d like. This will, however, prevent streaming of music for that App.
ACCOUNT MANAGEMENT
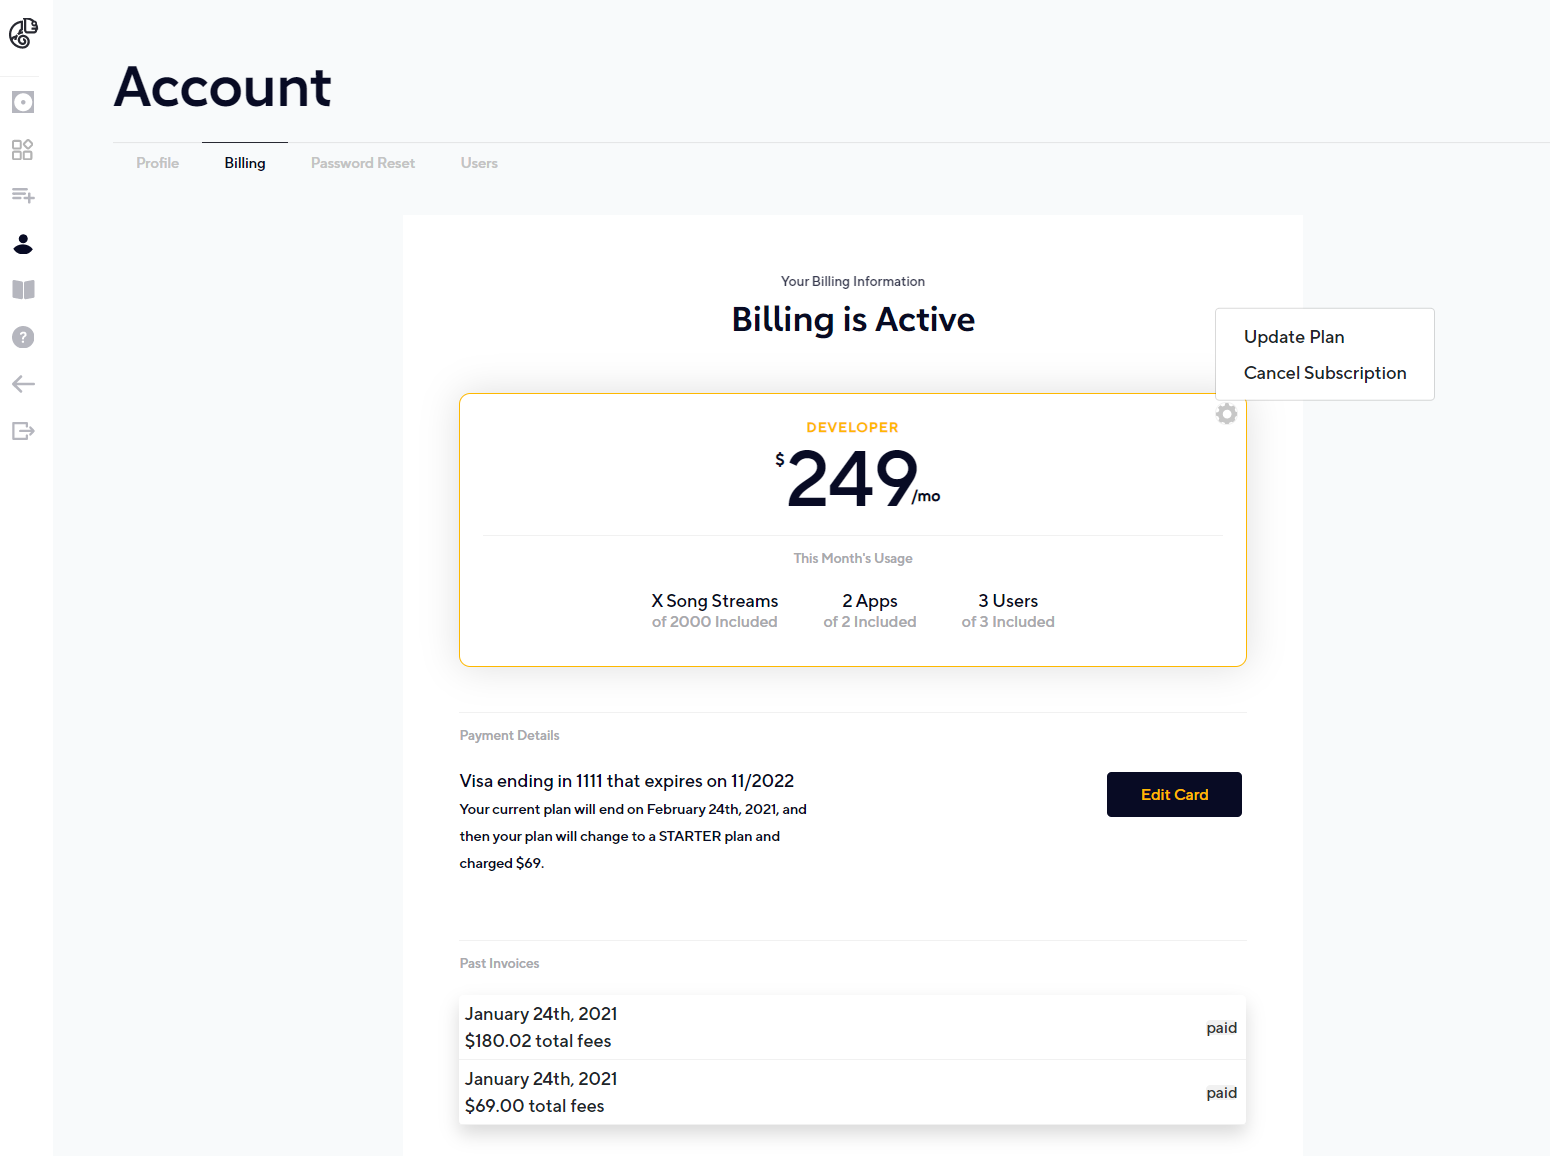
This is where you can add, edit and delete other user accounts on your master account. In addition, you can manage your plan, view invoices and analytics, reset the master account’s password and update your account profile.
PLAN MANAGEMENT
You must select a plan and provide payment information before you can stream music. Plan management is located on the “Billing” tab of the Account section.
Simply select the plan that fits your needs. Don’t worry, you can always change your plan later.
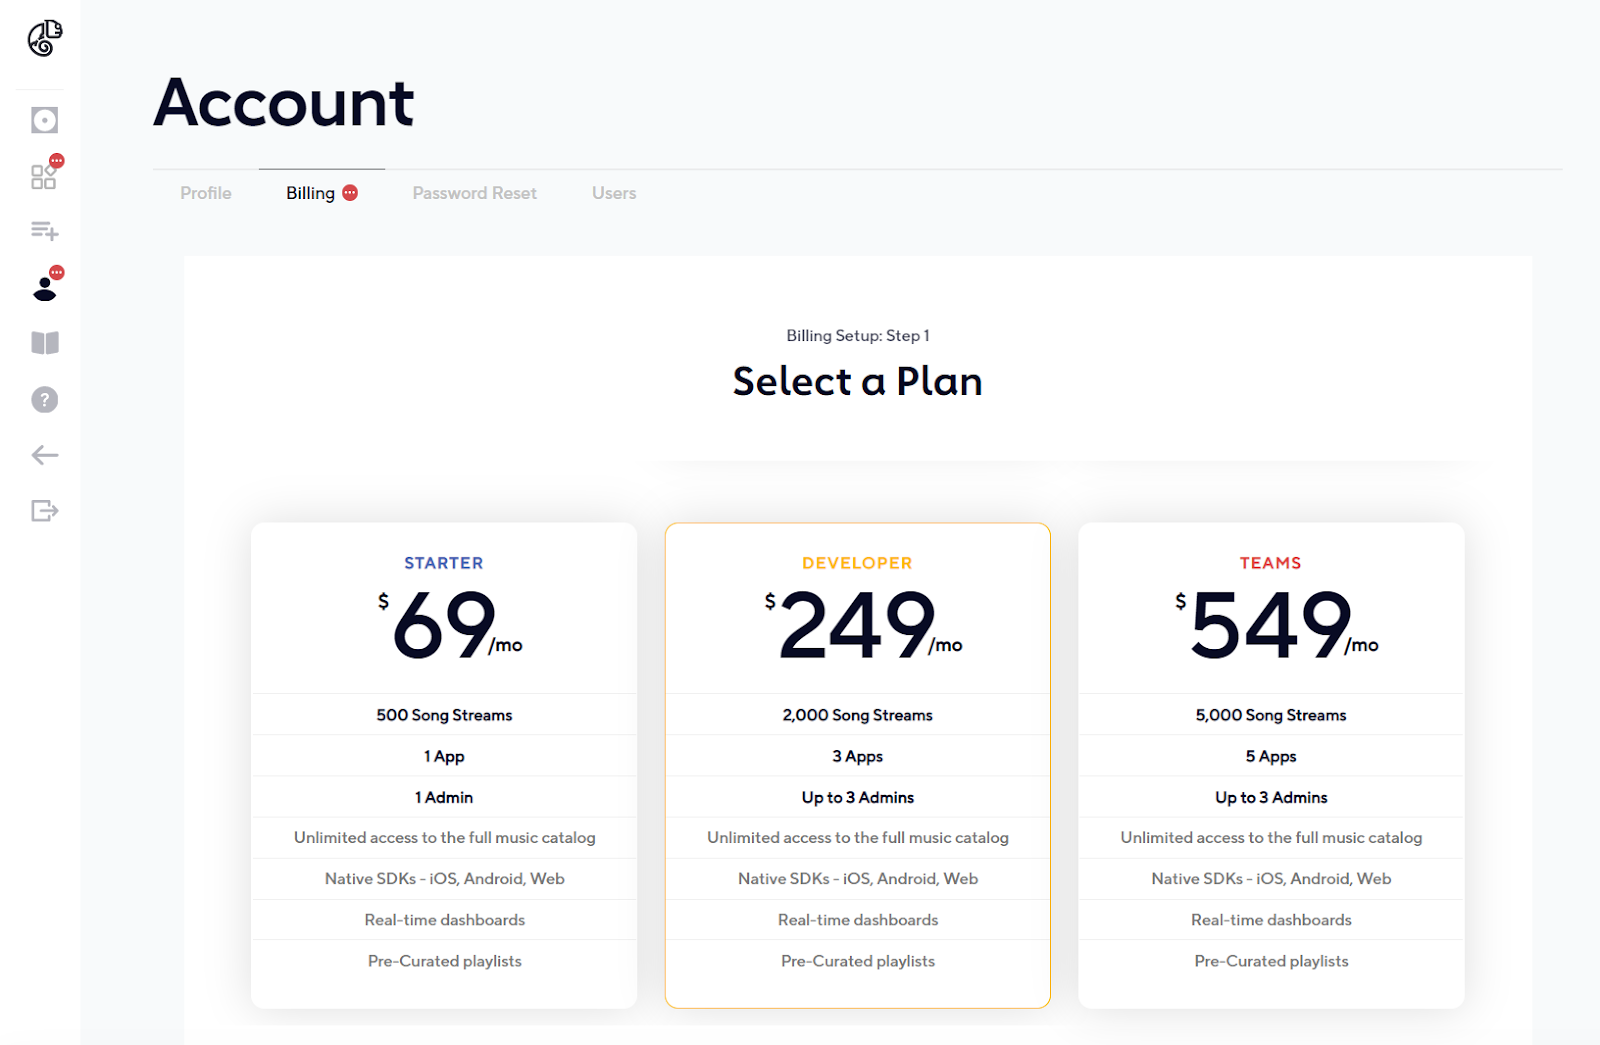
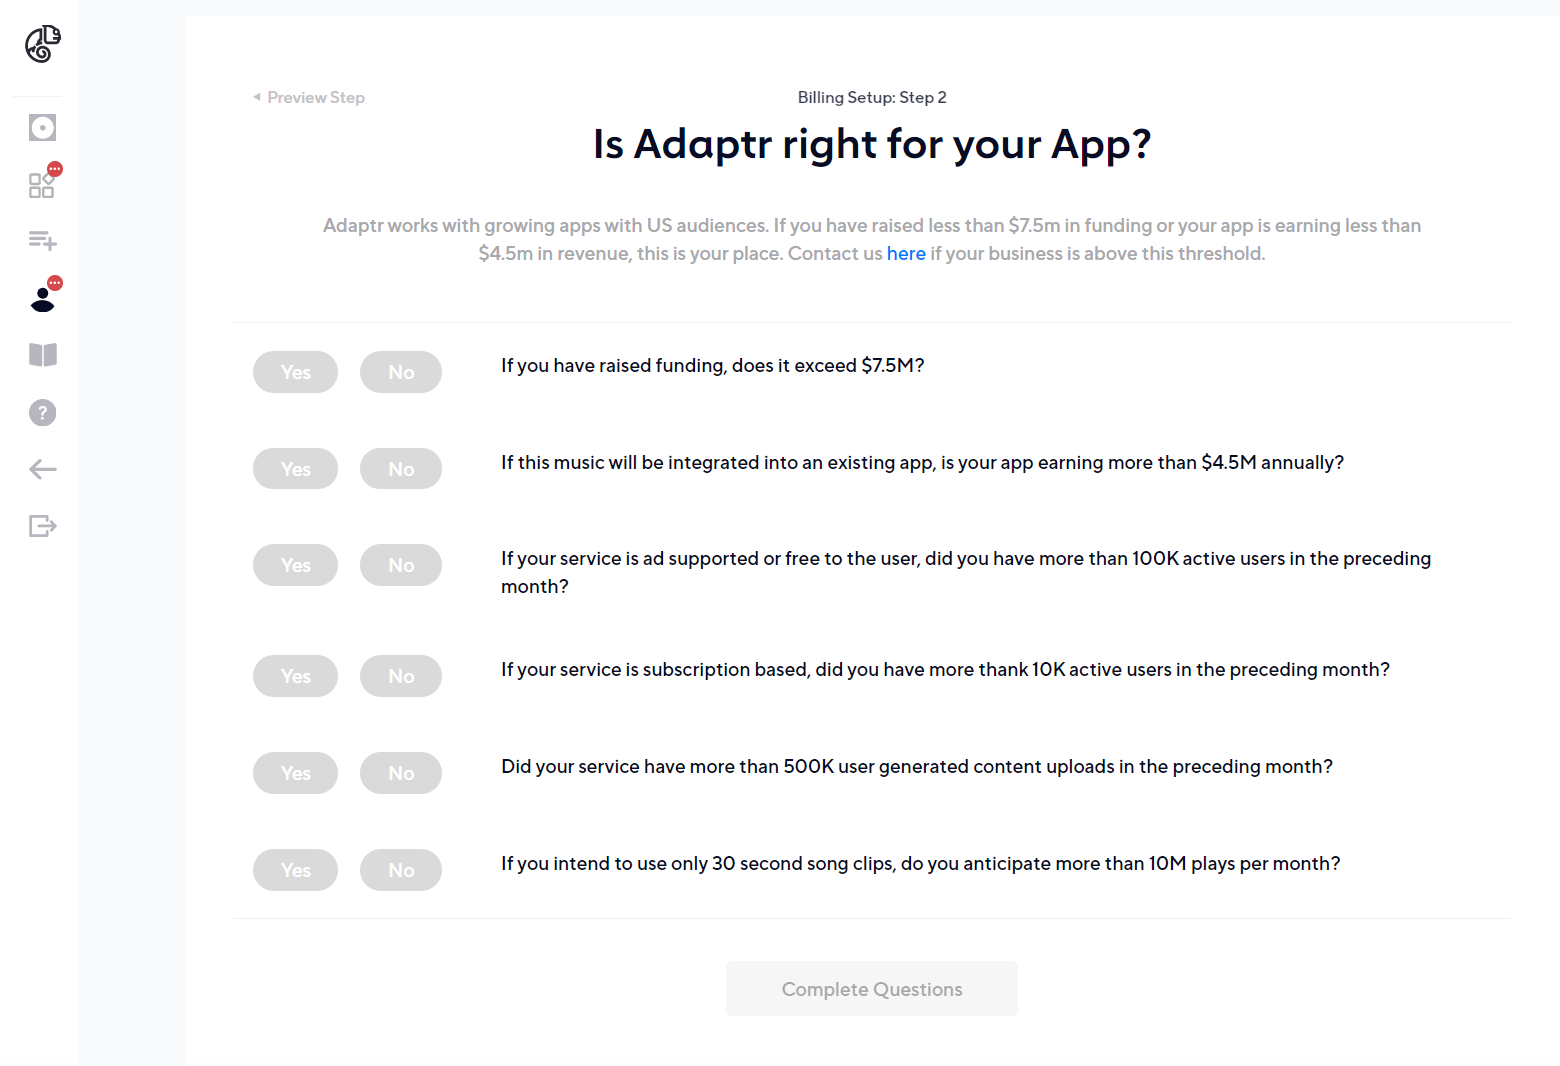
There is a short questionnaire to confirm you have the correct Adaptr pricing. Upon completing this form, you will either be directed to the payment capture screen or prompted to connect with the Adaptr sales team.
You can return to the Billing screen once your plan is confirmed to review your plan information, view invoices, and change your subscription.
ANALYTICS
The analytics section allows you to understand how your customers are engaging with your music experience.
The Segment analytics reports on metrics that define music streams, like total plays and session time